Georeferencing layers
"Georeferencing" is the process that embeds geospatial metadata into a historical map, allowing it to be integrated into modern web maps or other GIS software.
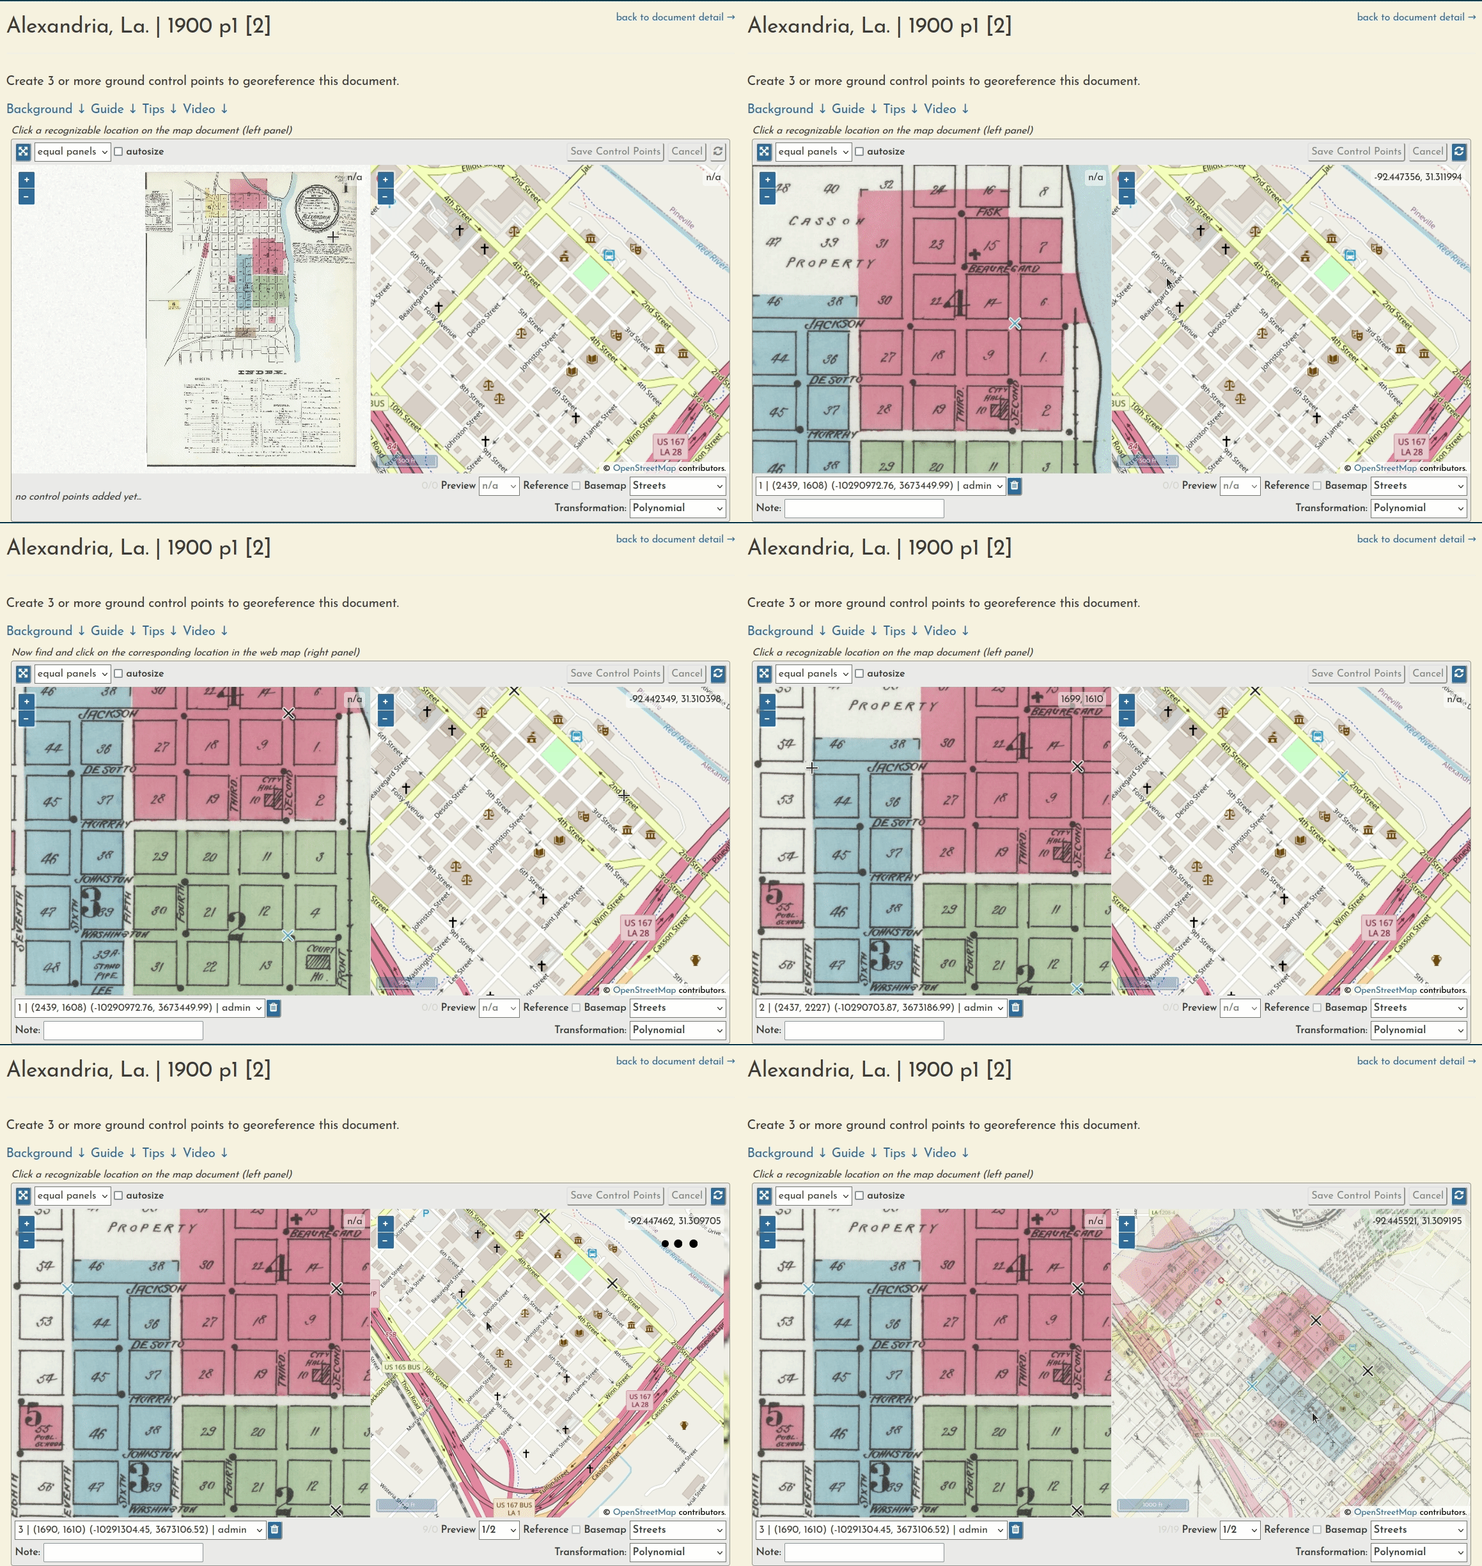
Users perform this task by creating "ground control points," or GCPs, that link features on the old map with latitude/longitude coordinates was represented on the web map.
Creating a ground control point requires two clicks—one in the left panel and one in the right. This records a linkage between a spot on the original map document and the real-world latitude/longitude coordinates for that location.
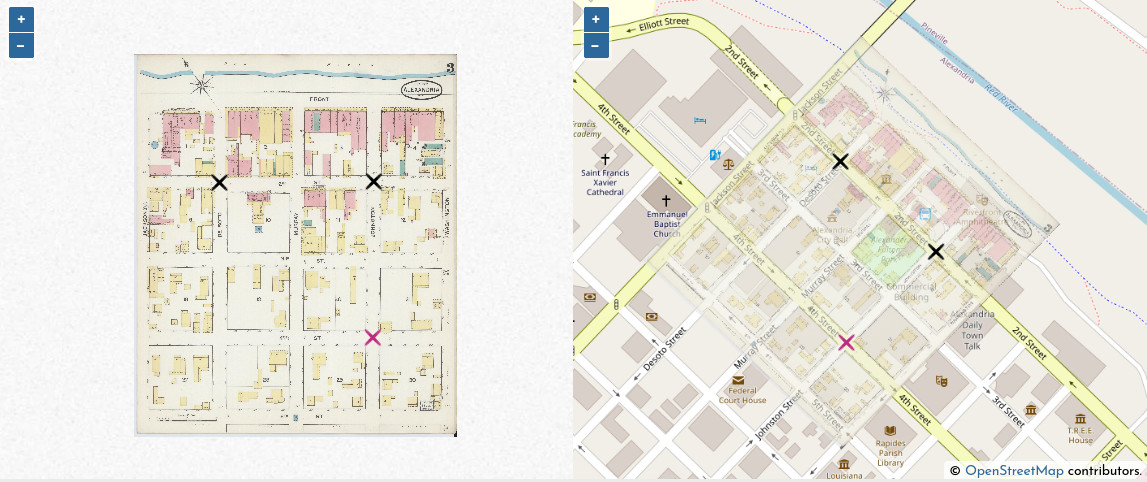
In the example image above, 3 control points have been made using street intersections. You can make as many control points as you want (the more the better!) but often 3-6 are enough. If 3 or more are present, a semi-transparent live preview will be added to the right panel. Use the w key to toggle preview transparency.
Using the Interface
Before starting, it can be helpful to pan and zoom around to become familiar with the document and the area.
Creating a control point:
- Start a control point by clicking on the map document (left).
- Finish it by clicking on a corresponding location in the web map (right).
- You can pan and zoom in both panels during this process.
- You can add a note to a control point. This is helpful if you are not 100% confident in your placement, or just want to point something out to future users.
- You can modify a control point at any time by clicking and dragging it.
Deleting a control point:
- Select an existing control point via the list in the bottom left, or by clicking on it in the panels.
- Click or type
dto delete.
Warning
There is currently an error that causes ground control points to get scrambled when is deleted.
Saving Control Points:
- You can only save the control points once you have 3 or more.
- Click
Save Control Pointswhen you are satisfied. This will start the warping process, which may take a few minutes to complete. You will be redirected back to the Document detail page in the meantime. - Click to reset the interface. This will remove all changes you have made.
Editing existing control points:
- If someone else has already georeferenced this document, feel free to modify their control points (or add more), to improve the georeferencing—this is meant to be an iterative process.
- Click to discard your changes and restore the original control points.
Managing layers:
- You can change the opacity of the preview layer by typing
w. - You can switch to an aerial imagery basemap with the
Basemapdropdown menu.
Managing the panels:
- You can increase the size of the left or right panel with the menu in the top left.
- Checking the
autosizebox will cause the panels sizes to dynamically update based on whether your next click should be in the left or right panel.
Transformations:
- It is recommended that you use the default transformation,
Polynomial. - Switching to
Thin Plate Splinewill allow the image to distort and warp to fit all control points exactly, which could be necessary in rare circumstances. - You can read more about GDAL transformation algorithms in the QGIS documentation (note: we are only using the Polynomial 1 transformation here).
Georeferencing Tips
- Prioritize finding control points that are widely spread across the map.
- Look for locations that have changed the least over time. For example, the center of street intersections, railroad crossings, or, in some cases, the corners or centers of old buildings.
- Locations to avoid using are the edges of city blocks, sidewalks, or street intersections of which you can only see a portion.
- Historical maps may have mistakes, or street names may have changed over time.

